Learn to remove and install a pre-woven sheet of cane. This project is more “woodworking” and less weaving with minimal/no weaving involved. No experience necessary. Moderate hand strength and the ability to work standing up is required. Modifications can be made for various conditions.
IMPORTANT: Please read our Workshop FAQs before signing up.
Don’t have time for a full class? Buy a Book. Watch our YouTube Video(s). And/or Schedule a One-on-One Tutorial. In-person, Zoom & FaceTime available!
General: Pressed caning, aka machine-woven, loom-woven or sheet caning is a two-part process.
Removal: If the chair behaves, removing the old seat and cleaning out the installation groove could take as little as ½ hour. If the chair is ornery, it could take 2+ hours with lots of hammering, chiseling, and gunk removal. Once the material is removed from the groove, there is a bit of prep work necessary before installation.
Installation: Once you start, you can’t stop! This is one of the more time-sensitive chair caning processes. There is a fair bit of hammering but it is pretty straight forward. If your chair behaves, you could be done in an hour or two, depending on the size/shape/construction elements of your particular chair.
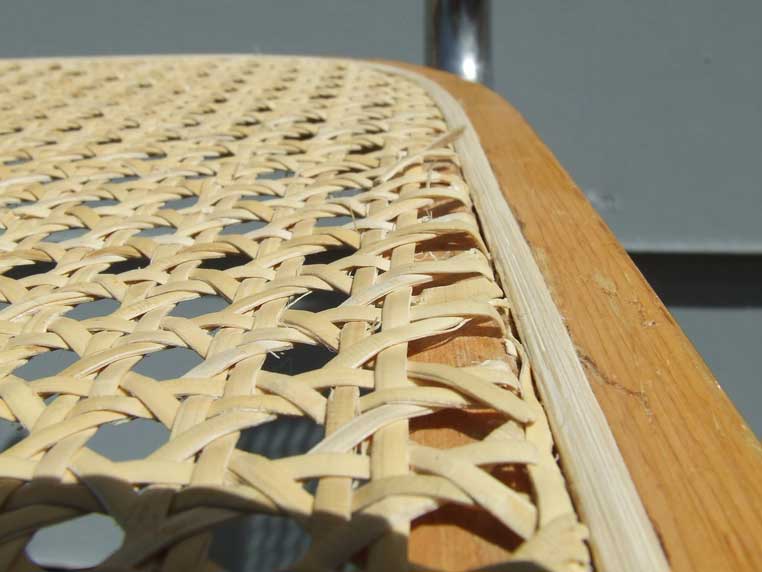
Chair Identification: Your chair will have a thin piece of wood between the cane panel and the wooden seat frame. You will not see loops of cane underneath the seat, but a flat wooden bottom.
Class Length: 1 Session [10am-4pm]; Each project timeline varies depending on how cooperative your project decides to be. You may need more time and you are welcome to stay until 5pm.
Class Size: 1-6 students
Class Fee: Includes 5-6 hours of instruction, cane webbing, spline and all tools necessary to complete your project. A special order fee of $10-20 is applicable for projects larger than ~250 in2 or special order webbing patterns. Additional fees for structural repairs and material for future projects.
BYOC (Bring Your Own Chair): Or notify us in advance and we can provide one for you for ~$40-60 depending on the style/amount of work involved in refurbishing.
Considerations when choosing a class project:
- Curved panels require significantly more effort, clamps and attention.
- Groove size ~⅛” or smaller can be SUPER-tricky
- Bentwood Rocker and Cesca Chair panels can be removed for easier transport and installation/removal.
- If your project is large or has lots of angles in the groove, it may take you longer than other students. Don’t worry, you’ll finish!
Before Class: 1 month before class we need to inspect your chair for structural issues and make sure we have the correct material for your project. You can make an appointment to visit us in-person, or send us photos of your chair via text or email.
After Class: Your chair will have glue in the channel/groove. It will need to sit still (preferably overnight) so the glue doesn’t run (if you have to lay the chair on its back to get into your car for the drive home). For chair seats, if you can transport your chair upright, you’ll be ok taking it home immediately. For chair backs, if you can transport your chair on its back, you will be ok taking it home immediately. Let the panel dry a full 24 hours before putting any weight on it.